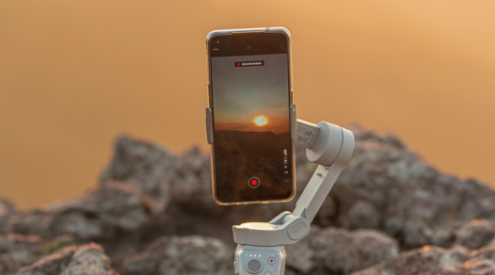


How often have you taken photos of a beautiful scene and looked at them afterwards to realize that they simply haven’t captured what you saw?
The reason for this is that your eye is able to perceive a much higher range of contrast – light and dark – than a standard photographic image can reproduce. For this reason, HDR (which stands for High Dynamic Range) processing has become a very popular technique, especially since the advent of digital photography.
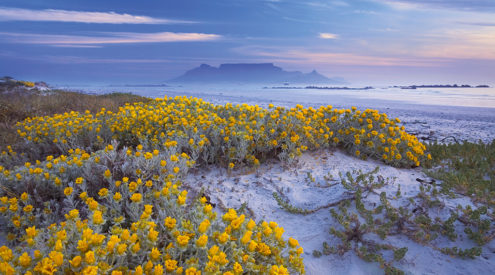
HDR is a way of manipulating a single image, or a series of images at different exposures, to produce a high range of luminance. By displaying the full detail available in both the brightest and darkest parts of an image, it mimics the way your eye is able to interpret scenes, resulting in images that look much more real and, in some cases, hyper-real.
Any decent digital camera that allows for exposure bracketing and/or can take RAW images can be used to produce HDR images.
What you’ll need for HDR
- A digital camera with RAW and/or bracketing.
- If you’re using the multiple image bracketing technique, a good, solid tripod.
- HDR software. Photomatix is excellent, easy to use and relatively affordable. The Light version is available online for $39 and the Pro is $99. Use the free trial first to get an idea of how it works, what it can do and whether HDR is for you. The trial is exactly the same as the full version, but produces watermarked images.
- Decent photo editing software. (Photoshop is the standard)
How to shoot for HDR
- If you decide to use the lazy single-exposure pseudo-HDR technique (as I do) your setup is pretty simple. Just shoot in RAW and take care not to clip your highlights. As a rule of thumb, I find it better to underexpose by 1/3 of a stop.
- If you’re going to do the full version of HDR, using multiple images, make sure you shoot in aperture priority and use your tripod. For obvious reasons, you’re going to want to avoid subjects with any movement in them – or be ready to do lots of work in Photoshop.
- For the multiple image technique, use auto-bracketing if you have it, and bracket 2 stops under and 2 over. Remember to shoot in RAW – you still want to capture as much information as possible.
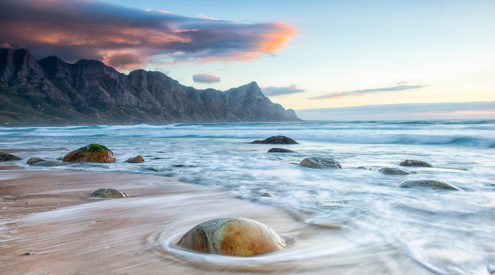
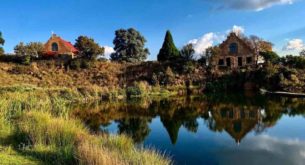
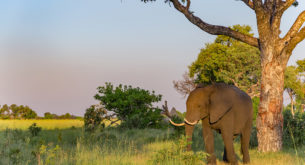
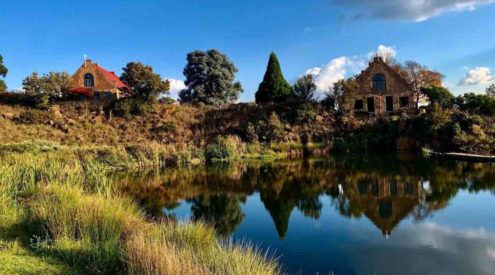
- In terms of subject matter, look for scenes with high contrast. Dark shadows, bright skies – scenes that look great in real life, but come out useless on your camera. This is where HDR produces the best results.
- This entails a slightly different approach to shooting. If you shoot a lot of standard images, you’ve probably become used to knowing when a shot “˜won’t work’ because of the contrast ranges. Start looking at the world through “˜HDR eyes’ to see the new photographic opportunities the technique brings.
How to process in HDR
- First, take a strong grip on reality. Sometimes the results you get from HDR are so interesting they can have an intoxicating effect and you lose track of what’s beautiful and what’s just plain weird.
- Next, read this excellent online tutorial on HDR. You’ll also find a link on this tutorial to get a coupon code for a discount on Photomatix Pro.
- Converting an image into HDR is simple enough. You’ll end up with a strangely dark looking image that is bound to disappoint you. Don’t worry – that’s just the first step.
- Proceed straight on to tone mapping. Tone mapping reduces the overall contract of an image, but retains local contrast (the contrast between pixels).
- It’s the tone-mapping, and your use of judgement here, that matters most. I’d suggest taking the “˜Strength’ slider on the tone mapping toolbar in Photomatix right down to about 30% and creep slowly up from there.
- Always, always use the “˜Very high’ setting on Light smoothing. Just for fun, take it down to “˜Very low’. See what I mean? Scary stuff. That’s the kind of thing that gives HDR a bad name.
- If you’ve done a lot of shooting in RAW previously, I’d suggest going through your old shots checking for any images that you’ve previously discarded too contrasty. (On that note, I’d like to spread my personal gospel of “˜Never delete your photographs’. Memory is cheap, your photos are priceless.)
- If you look through the images in the image view above, check out the before and after shots of each, expecially the photo of the castle at Gondar. Shots that previously seemed to have no promise, even after heavy standard processing, suddenly show real potential and may even become prizewinners.
So that’s it: go out and play, have fun seeing the world in a fresh way – but try not to go overboard 😉
A couple of cool facts about HDR
- HDR was first used as early as the 1930s. Possibly the most famous early use of HDR was Charles Wyckoff’s detailed pictures of nuclear explosions, which appeared on the cover of Life magazine in the mid 1950s. He did this by combining differently exposed layers of film.
- Although HDR is unlikely to become a standard for TV and video, it’s a necessary technique for many special effects, especially those where real footage is combined with computer-generated images.