


We receive countless beautiful images of seascapes from our readers and are envious of every one. Here are some tips to make your seascape photography even better.

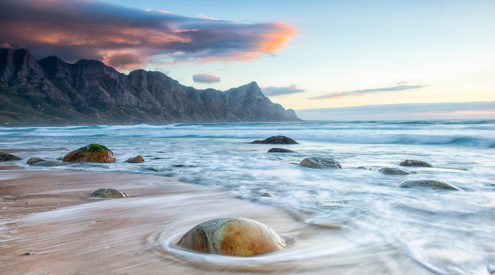
This image was shot just after sunset. Photo by Teagan Cunniffe
Maybe it’s the coastline-loving Durbanite in me, but seascapes are one of my favourite things to photograph. I’m sure many of you can relate to the experience of having sand beneath your feet, friends and family at your back merrily drinking sundowners and fresh sea-breeze blowing while you stand and look out at the wheeling seagulls, crashing waves and changing colours of the skies, camera at your side. Moving water gives us a whole new element to play and experiment with in our images.
So many of us are lucky enough to live near shorelines or go on holiday to seaside destinations. For those of you who are landlocked, some of the guidelines can be applied to lakes, rivers and waterfalls.
In November last year we ran a masterclass with tips to improve your seascapes, which I will touch on and add to.
Tips to improve your seascape photography
Wait for the light
Shoot at sunrise or sunset for the best results. The quality of this wonderful light – pinks, mauves and blues reflected in the water, sand and sky – can turn a bland seascape into something striking. Clouds pick up the colours of the setting sun, turning the sky a myriad of vibrant shades. However if the is too much cloud cover, rather focus on the textures around you: rock patterns, seaweed, shells, pebbles and patterns in the sand.
Get close to the water
Stand as near as you safely can to the water. It will change a detached, observant picture to an image that makes viewers feel as if they’re part of the scene. Wide angle lenses capture more of the scene and give the image a dynamic feel, pulling the viewer further into the image.
Include a point of interest
Place a person, lighthouse, piece of driftwood or a prominent rock in the composition, so you don’t lose the viewer’s attention in a vast expanse of sea and sky. It also gives the scene a sense of scale and adds three-dimensional depth. Graphic lines created by clouds, rocks or water movement will lead the eye towards your chosen point of interest.

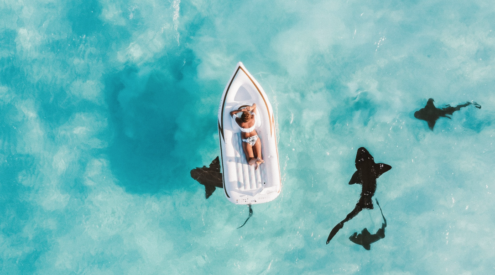
Having a point of interest makes it easier to give purpose to an image. Photo by Teagan Cunniffe
Keep an eye on the horizon
Use the camera’s built-in spirit level, grid lines or virtual horizon display (most cameras have at least one of these tools) to prevent a skew horizon from ruining your photograph. Place the horizon one of your rule of thirds lines, either the top 1/3 of an image or the bottom 1/3 depending on whether you want to show off the brilliant sunset or striking rocks and swirling waters. Rules are meant to be broken when it comes to photography so don’t be afraid to experiment with what you feel looks good.

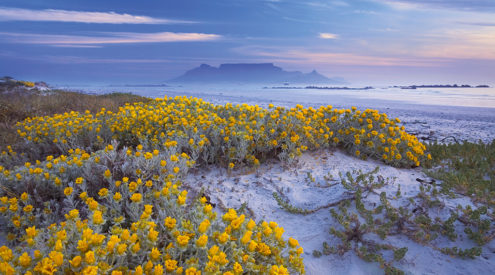
This image doesn’t conform with the rule of thirds at all. Bend rules when you feel fit to depict what you find most appealing in an image. Photo by Teagan Cunniffe
Capture movement
With a tripod for stability, use a shutter speed of 1/15 second or slower to create a misty water effect. A neutral-density filter will reduce the light – which allows longer exposure times – if necessary. Alternatively, use a shutter speed of 1/500 second or faster to freeze the action of that gorgeous, big wave crashing on the rocks.

Play with long exposure and let the streams of water decide how your image will turn out. Photo by Teagan Cunniffe
As always, if you have any great tips or links to your own images, post them below in the comments.
Happy seascaping!