


If you’ve been under the impression that your photographic forays should end when the crickets start chirping and the bats come out to play – think again! Low light shooting can be as rewarding as it is fun and you don’t need much to get started down a new avenue of creative exploration.
What you will need:
- Camera with a ‘Bulb’ function
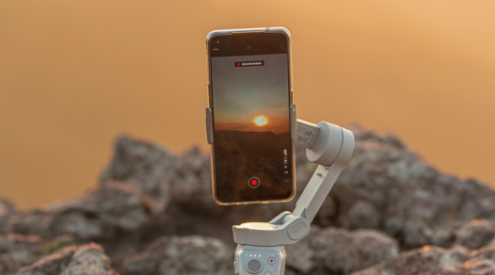
- Sturdy support such as a tripod or beanbag
- a healthy dose of patience
Optional extras:
- Cable release, remote or your cameras timer function
- A light source to help you setup and even do some light painting with.
- A Flask with your preference of throat warmer inside.
I’m sure you’ve pulled out the camera just after a beautiful sunset and noticed that the camera exposed for the sky and you lost all of that lovely detail in the foreground, or your camera popped its built in flash trying to balance the scene. To combat this and retain sharpness we need to keep the camera absolutely still. Use a tripod or if you’re on a budget, or have space constraints, rest your camera on a beanbag.
Next, you will need to lock in your camera’s ‘Bulb’ function on either your in-camera settings or camera dial. Open your aperture as wide possible, push your ISO to 800 as a starting point and use your timer function if you don’t have a cable release. I use a cheap ebay cable release that doubles as an intervalometer. This is especially useful if you’d like to try your hand at time-lapse photography.
Other tools pros use to help is a function called ‘Mirror Lockup’, which as stated will lock the mirror before the shutter fires. This reduces shake and small vibrations that cause blur and loss of sharpness.
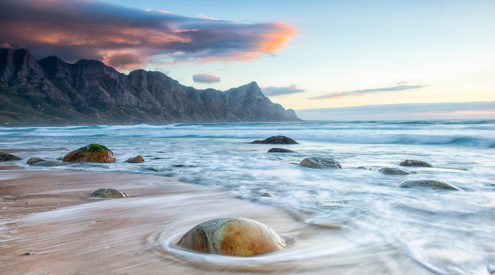
Frame your subject to your liking, you might need that torch for this and now you can just stand back and click away. To get a better grasp of the exposure time experimentation is key, start with a 15-25 second exposure and then adjust up or down accordingly. When shooting stars it helps to turn the focus dial to the infinity icon (it looks like an 8 flipped on its side), usually found on your focusing range and after doing this switch to manual focus to prevent the autofocus from interfering.
Some subjects definitely worth exploring are light trails of cars, light painting, city lights, stars, star trails and fireworks. Starting with these will help you gain a good understanding of low light shooting and might even improve your skills in other areas!
So don’t be afraid of the dark, use it to your advantage and you might even walk away with a few shots worth the space on your wall!