
In the March 2015 issue of Getaway magazine, we tackled the timeless black and white photograph. Post-editing techniques are a huge part of creating stunning black and whites, so we’ve put together some of our top tips and links for you to try.
Also see: Black and White Phototips by Heinrich van den Berg
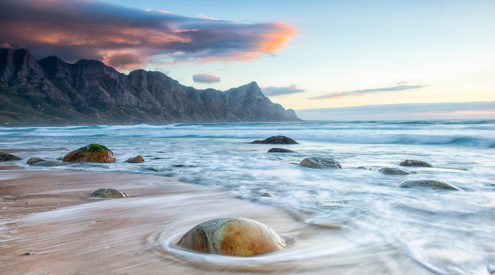
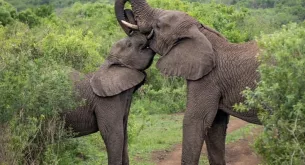
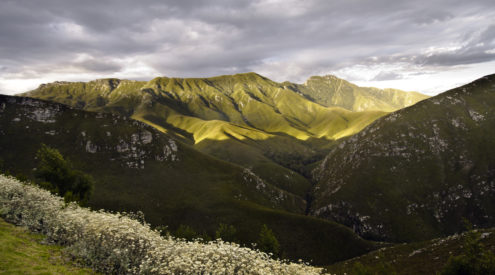
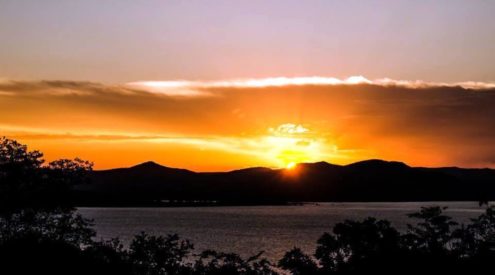
B&W image created using the Black and White tool in Photoshop’s ‘adjustment panel.’ With this tool, you can control how colours are affected by the BW conversion. The deep blues of the sky were prominent, making them easy to select and darken. Photo by Teagan Cunniffe.
First off I should say that I work almost exclusively in Photoshop and my tips below deal with Photoshop post-processing only. If you use Lightroom, skip ahead for some links that my Lightroom-using colleagues have recommended for black and white photo editing.
To take your black and white conversions further, you can buy software plugins like Nik Silver Efex Pro and Topaz Black and White Effects (try their 30-day free trial) which bolt into both Photoshop and Lightroom (and some other software packages) providing a full suite of black and white editing power. Other B&W editing software is also available.
Converting your image to black and white in Photoshop
There are many ways to convert images to black and white in Photoshop. I have listed the one I use below because it gives me the quickest results. Often the best route depends on your image, but for general use I find this approach is fast, efficient and produces great final photos.
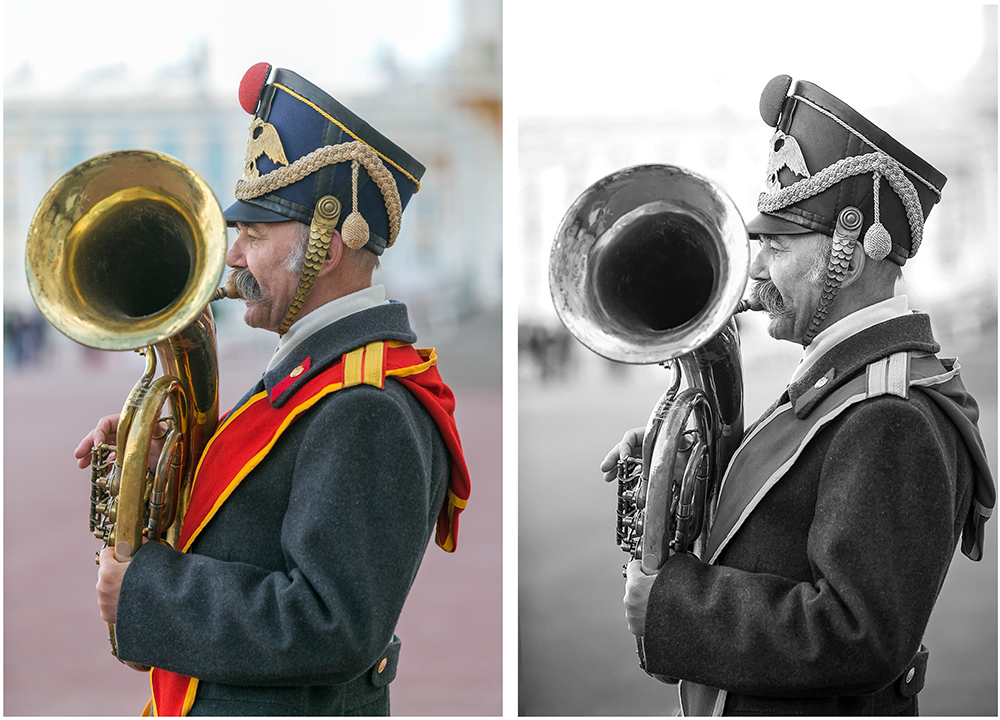
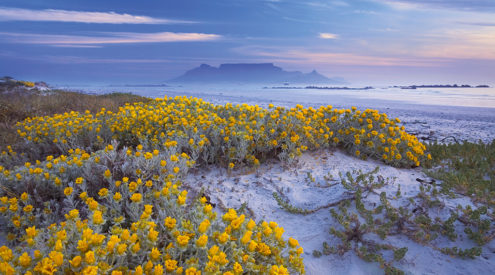
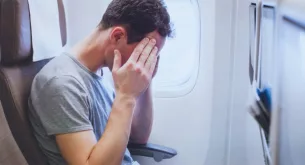
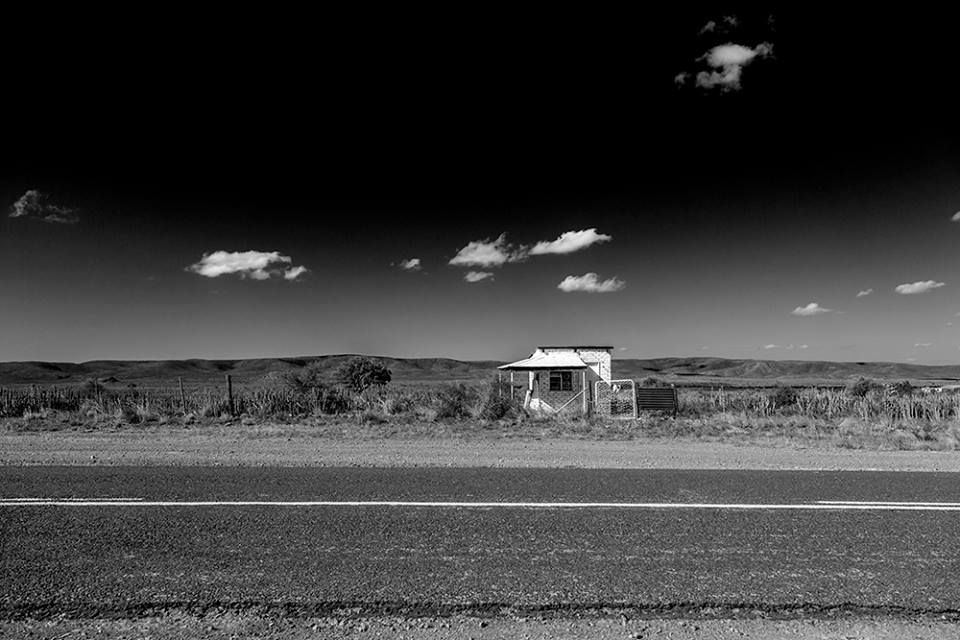
Before and After black and white conversion.
Using the black and white adjustment layer
- Open your image in Photoshop.
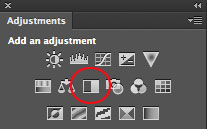
- Go to your adjustments panel. If you don’t have this active, find your Window tab and select ‘Adjustments’ from the drop-down list. Make sure ‘Adjustments’ is ticked.
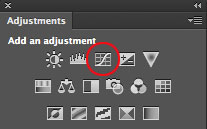
- Select the black and white adjustment panel from the options that should now appear on the right of your screen. It is the half black, half white square seen below. Once clicked, a new adjustment layer will automatically open.
- Using the black and white adjustment tool, you can selectively change colours, i.e darken only the reds or blues in an image. You can also use the presets found in the drop-down menu.

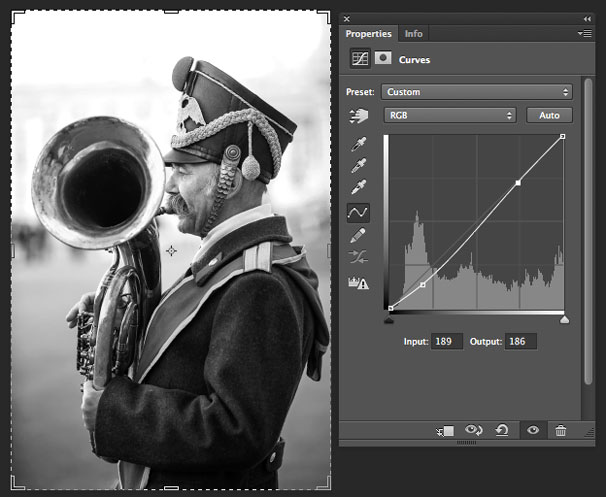
- Open up your curves adjustment, found in the adjustment panel mentioned above. It is the S-shaped button, third from the left on the top row.
- Up the contrast of your image by dragging points on the middle line up or down. The points correspond to your histogram, which runs left to right: shadows to midtones to highlights. Creating and moving a point on the left hand side, will affect only the darker tones of your image. A true black and white has tones of complete black and white, but as always, go with your own preference and play around until you have an image that looks right to you.
And that’s it! Each image will require slightly different adjustments. It’s up to you how many you want to make in order to achieve the perfect final black and white photo.
Black and white processing in Lightroom
First off, you may find this article helpful.
Otherwise there are a number of useful Lightroom presets available for creating black and white images. Some are free, and for some you’ll need to shell out some cash. If you’re going to spend money, my advice would be to try Topaz Black and White Effects first and if you like it, you can buy a full B&W editing package for a reasonable price.
List of B&W Lightroom presets at
(Not sure how to install presets? Here’s a simple guide.)
- Presets Galore
- Presetpond
- Photo Graphypla
- Insidelightroom.com
- Lightroomkillertips.com
- Flixelpix
- Wonderlandpresets.com
Good luck, and happy editing.