


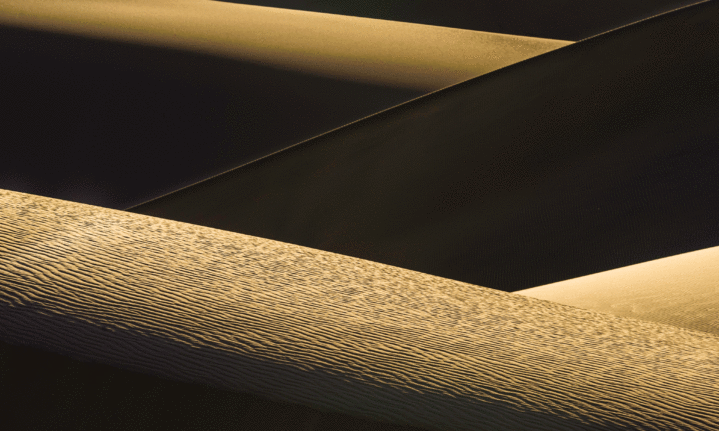


When it comes to photographing miles and miles of dunes, think less is more. Andreas Eiselen tells you how, using this image by nature photographer Paul Godard.
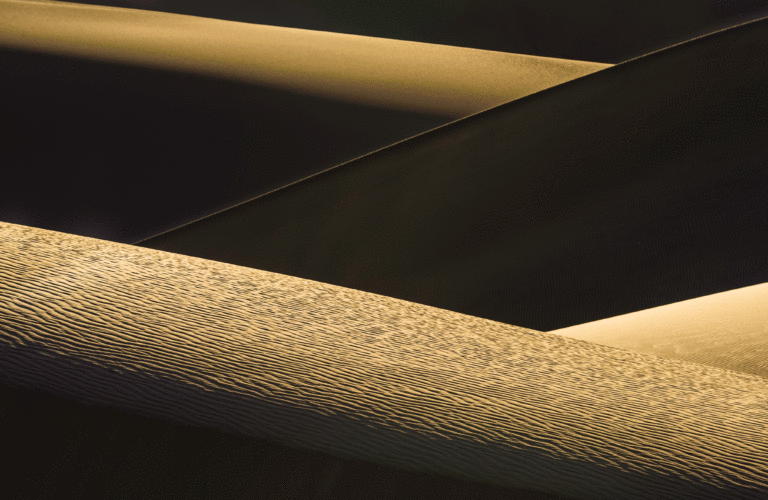
Equipment Nikon D700, Nikon 70-200mm f/2.8, Manfrotto tripod, ISO 200, f/8, 1/350 sec. Image Credit: Paul Godard
Paul says…
This image was taken at 7.45am near Sandwich Harbour, south of Walvis Bay, at the end of a four-day desert photographic safari in the Namib. The variation of textures, colours and shapes was amazing, turning every scene into an abstract painting in the morning and evening light. What appeals to me most is the contrast between the straight lines and the softness of the sand, accentuated by the strips of light and shadow. I use a tripod even when there is enough light so that I can fine-tune my framing (I like to perfectly frame my pictures in-camera instead of in post).
Take it yourself
Use light, shadow, graphic lines and shapes to create inspiring minimalist landscapes.
Equipment
Instead of the wide-angle lens you would usually choose for landscape photography, use a telephoto (70-200mm) on a tripod. The tripod is not only for stability but also slows you down, forcing you to think about composition.
When changing lenses in the desert, know that sand will get inside the camera body no matter what. Ensure that your camera is switched off, as the sensor will be even more static when the camera is on.
Settings
Keep the ISO low (100 to 200 should allow enough sensitivity). With a longer lens, the depth of field will be shallow, so shoot with smaller apertures (f/8 or above) to get sufficient sharpness throughout your image.
If you’re photographing in harsh light, keep an eye on the exposure (check the histogram) as the camera tends to underexpose brightly lit sand and it’s easy to lose detail in the shadows.
Practical
Simplify your scene by using a telephoto lens and zooming in, cropping out anything distracting or unnecessary.
Remove all unimportant elements and leave the bare bones of what is necessary to convey an idea or emotion. At the core of a great minimalistic image is excellent, well-planned composition.
Keep in mind negative space (the area between and around objects) and other classic rules of composition. See Know Your Stuff.
Look out for interesting elements like wind-blown sand catching the sunlight over the edge of a dune, or a single object of interest in a sea of repetitive lines. Place this element in a prominent position in the frame according to the rules of composition.
Shoot early in the morning or late afternoon. The angle of light will highlight the edges of dunes, creating a feeling of depth. The contrast between light and shadow flowing over the dunes creates drama and interest.
Starter tip Resist the instinct to go wide-angle when faced with an expansive landscape, or your image could end up looking very busy. Focus on segments of the scene.
Amateur tip Find leading lines that feed the viewer’s eye towards your main subject/focal point.
Pro tip Bracket up and down, by changing the shutter speed, to get the correct ‘feeling’ for your image. For example, it could look better to underexpose the shadows, leaving only the brightest parts of the image correctly exposed (as in Paul’s photograph).
Paul’s tip Get there early and take your time to look around and see if there isn’t a better angle or place to get a better shot.
Know your stuff
The rules of composition are there to make good images great
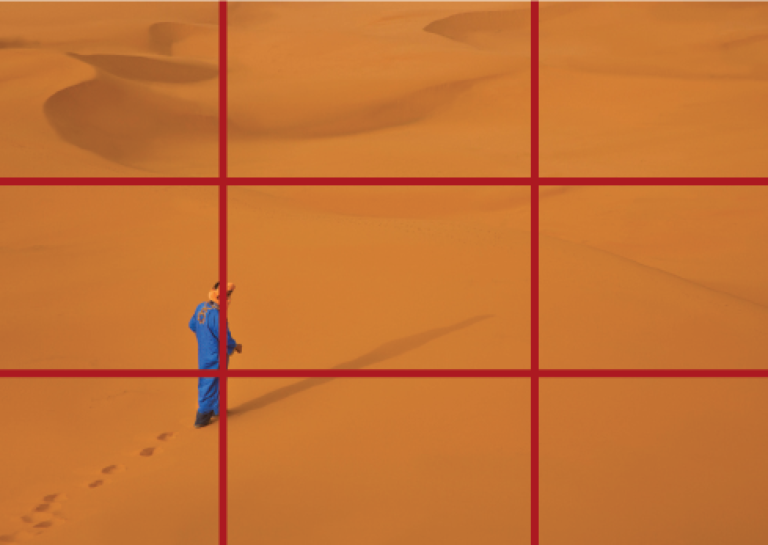
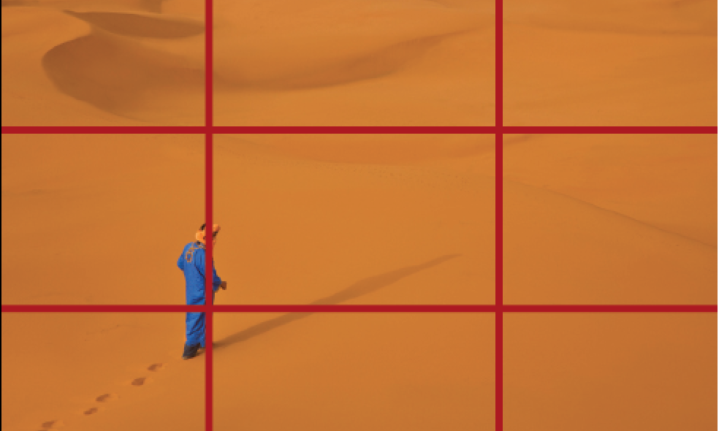
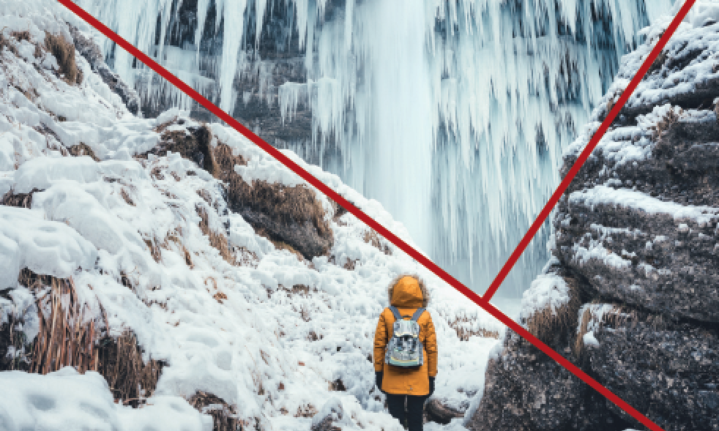
Image credit: Getty Images
Rule of thirds
Divide your image into three equal sections, horizontally and vertically. The strongest points for placing your subject are at the intersections of four imaginary lines. Positioning the landscape’s horizon on one of the horizontal lines will also strengthen your composition.
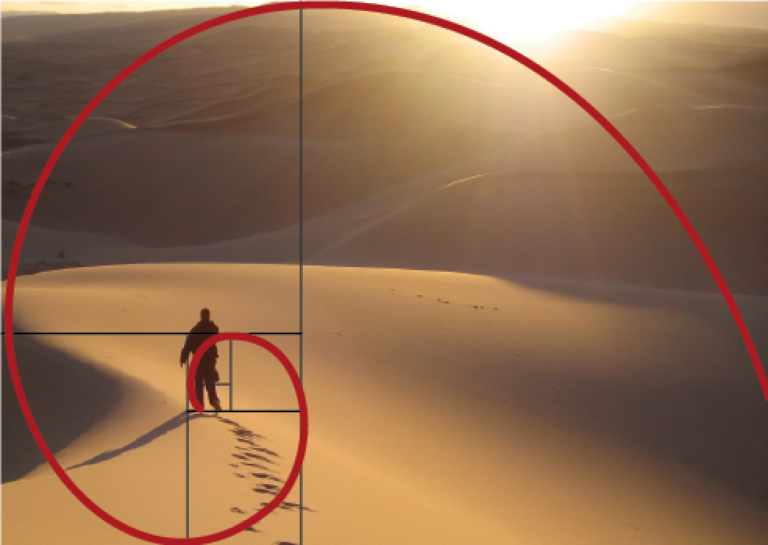
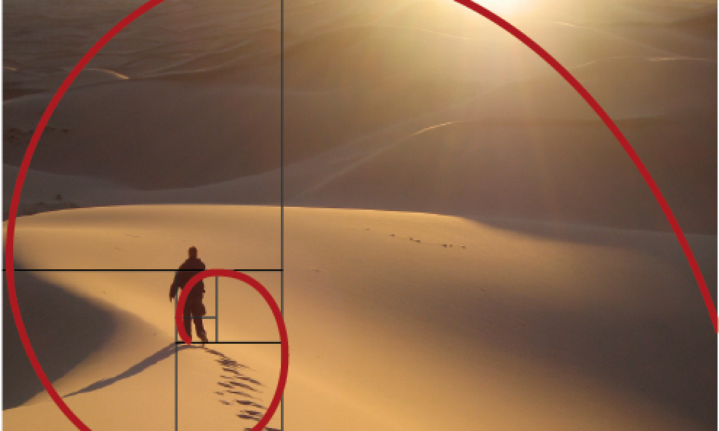
Image credit: Getty Images
Golden ratio
This souped-up version of the Rule of Thirds uses the golden ratio to position your main subject. Placing a subject in the smallest curl of the Fibonacci spiral (worked out using the golden ratio of 1.618) will draw the eye through the image towards it.
The maths is complicated but fortunately all you need to do is familiarise yourself with the shape of the spiral and use it when framing and placing your centre of interest.
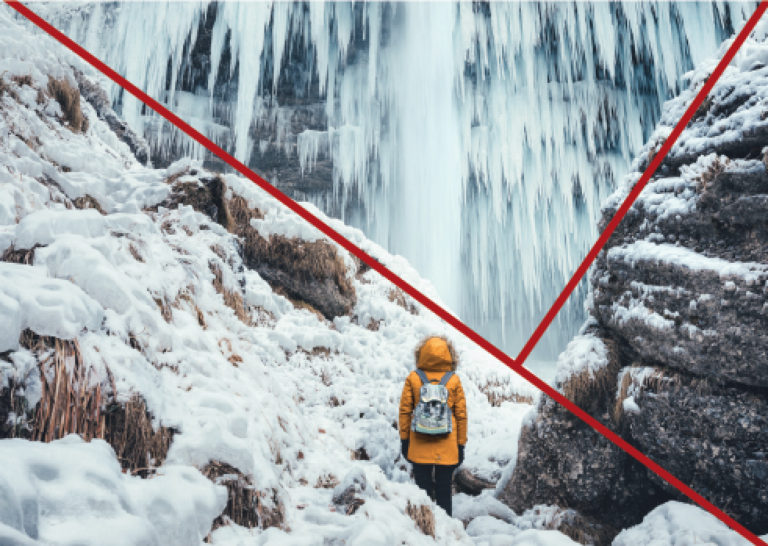
Image credit: Getty Images
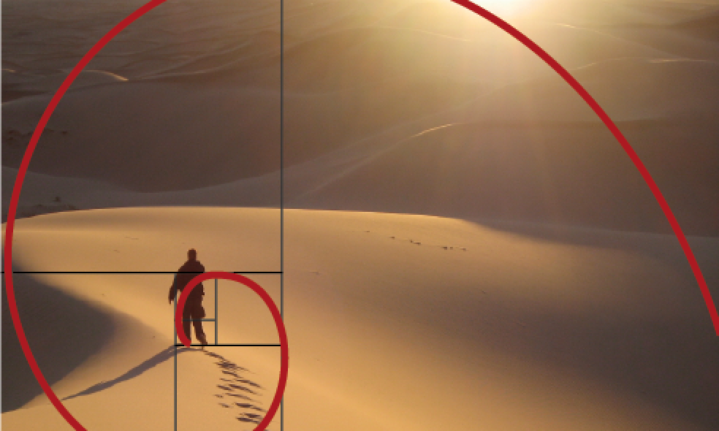
Golden triangle
This variation is very useful when there are naturally occurring diagonal lines in your scene. This rule states that when you draw a line from one corner to the opposite corner of your frame, and then draw a perpendicular line from any open corner to the first line that intersects it at 90 degrees, you find a strong position for your subject. Any naturally occurring lines running through the image should be placed on or close to the first diagonal line.